Showing posts with label hand-painted silk scarves. Show all posts

Sunday, November 24, 2019

Blue, Green, and Aqua Impressionistic Hand-painted Silk Scarf

     This impressionistic blue blend scarf is a new favorite--in fact, one I plan to keep for myself. It is especially pleasing that it is a rescue of a scarf that went wrong (see earlier post about that mistake). The white and misty aqua background that was left after I removed the messed-up gutta seemed perfect to re-do in a scarf with a blue, green, and aqua swirling print.
Close-up of one end

Close-up of other end

     After choosing the palette and blending the colors I had tested and wanted to use, I wet the entire scarf well. Then, with a soft brush, I swirled the colors on in a sort of "planned random" way with a bit of unpainted area between many of the swirls so that the hues would flow together without too much mixing. I didn't want the colors to muddy each other or to blend too much. Once that looked satisfactory, I deepened some blue areas and quickly sprinkled kosher salt over while the areas were still quite wet. Using salt on wet French silk dyes works a kind of magic as the scarf dries, producing jagged lines, star burst effects, and concentrated darker spots. Sometimes, I do further modification of the colors or pattern after I see how the scarf looks dry. It would have been a mistake to tamper with these results; in my opinion, it is lovely just as it is. Now it's getting hard to wait to wear it; five newly hand-painted silk scarves are ready to be steam-set. One more, and I can load up the steamer and complete the finishing processes.
Close-up of center
By the way, I will have one or two more posts about our trip to the Grand Tetons and Yellowstone, but took a break to show you this newly painted scarf.

Question of the Day: Do you prefer defined patterns on silk, such as tulips or starfish, or a more abstract or impressionistic look?

Thursday, February 28, 2019

How I Prepared for the Holiday Pop Up Shop for Art and More

Hand-painted silk scarves on display
     Preparing for our Holiday Pop-up Shop was simpler than preparing for my own in-home studio open houses had been (index of those posts here), but it still required advance work and lots of lists. As I mentioned in my previous post, my neighbor initiated the pop-up shop and hosted it in her home this past November. We talked several times on the phone and in person a couple of months ahead and did some of the planning together, but she did the heavy lifting of clearing space in her spacious living/dining room and the attached office/studio, setting up tables for our displays, and purchasing nice cheeses, crackers, and fruit.
The paintings on the mantel

     My display space in her office/studio was well-lit and pleasant--as were the areas for her own art and the wares of other sellers participating in the larger living area. I brought my own tablecloth as a softer background for my hand-painted silk scarves and some smaller acrylic landscapes. There was room on a mantel behind me for a few larger paintings. So, how did I prepare for this event?


Smaller paintings on the display table
INVITATIONS:
Some of the supplies for the Pop-up Shop
     For my solo open studio receptions in the past, I had special invitation postcards printed and mailed them about 3 1/2 weeks before the event (one example; another example). For the Pop-up Shop, our host had requested us to limit our invitations to about 20 apiece so that her home was not overwhelmed--also so that she could post a general invitation at our neighborhood bulletin board and put up signs inviting passers-by to stop in. So, I purchased standard invitations to send, making sure that the information I wrote inside was complete and likely to attract interest in attending our event. The invitations were designed to arrive about 2 weeks before the event (Given the timing, I didn't want to go earlier and compete with Halloween for any one's attention).

     
OTHER PREPARATION DETAILS:
Close up of a painting's price tag
     Rather than plain price tags, I found pretty gift tags with room for the titles and sizes of paintings or the specifics of each scarf. It's surprising how much time it takes to do something as simple as to write out and attach price tags. The scarves were all freshly pressed, and the paintings wiped clean of any dust. I also had enough small bills to make change for cash customers and my receipt book ready. Small peach-colored gift bags with bright white tissue paper would hold purchased scarves and a roll of brown paper would wrap paintings to go home with customers. I used a pottery business card holder (visible in the photo of paintings on the table) and had flyers about my journey into making art ready to offer. 

     
SET-UP:
     Beginning set-up about an hour before our opening gave me plenty of time to take a few photos of my display and to meet the other sellers, who were each delightful and creative. Although I ended up wishing I had started a few of the prep tasks a day or two earlier (which seems to be typical for me :), my lists and the advance work I did paid off and all went smoothly. 

Question of the day: Are you typically well-prepared for things ahead of time, or are you a last-minute person? Or, like me, a bit of both that somehow works out?

Monday, January 21, 2019

In-home Holiday Pop-up Shop For Art and More

My display at the Holiday Pop-up Shop at a neighbor's home
     In early November, I participated in a Holiday Pop-up Shop at a neighbor's home. I offered landscape and seascape paintings and hand-painted silk scarves for sale. The event was my neighbor, Cheryl's, idea, and she had invited me some weeks before to join her and other sellers she knew for the one day event in her home. Although the price point of my paintings made selling them in that setting unlikely, I thought it would be a way to connect with some new people. Since my scarves are in the $60 - $70 range, I thought a sale was possible, but was quite ready to make the effort and to enjoy the experience--sales or no sales.

     Your response to previous posts about Open Studio Receptions I have held at our home (those posts are perennial favorites for visits) means I expect many readers to be interested in the planning, process, and set-up of the Pop-up Shop. Cheryl, our host, who has begun creating lovely watercolor/calligraphy greeting cards and other items recently, said that remembering those receptions at our house was one of the sparks for her pop-up shop idea. 

     With all the information I could cover, I'll write more than one post about our Holiday Pop-up Shop. Today, I'll begin at the event itself and back up to the details of preparation(that post here) at another time. Besides Cheryl and me with our art works, the sellers were a portrait and family photographer, a Younique makeup representative, and a woman who sells Paparazzi jewelry. The group provided a nice variety of offerings, and our guests/customers very much enjoyed the event. Many of them spent a fair amount of time circulating, chatting, and enjoying water or coffee with cheese, crackers, and grapes as well as shopping. 
A guest asking about my painting process

     The photo above shows my area, with a table provided by Cheryl, my own tablecloth and some paintings displayed on a mantel behind me. Oh, and by the way, I did sell a few scarves. More important, I think, is that I met wonderful people. Cheryl had encouraged us before we opened to focus on people and on our interactions with them more than on sales. She was right; we and our guests had a very enjoyable few hours, and sales did flow for each of us. Also, many people who spent time with me took my card and may contact me for paintings or scarves in the future.

Question of the day: Aside from on-line purchasing, what is one in-person holiday shopping experience that you especially enjoyed or gift purchase that felt extra satisfying?


Friday, November 30, 2018

Deep Rose and Grey Hand-Painted Silk Scarf--Where Design Ideas Come From

Deep Rose and Grey Scarf before steam setting or removal of the gutta resist
     This 11" x 60" hand-painted silk scarf in deep rose and grey with white outline flower design sold so quickly after I completed the final finishing steps that I only have mid-stage photos. I think that's a happy reason for the lack of a better picture to show you! When the piece was completely finished, the colors were more intense, and the white outlines purer and brighter. 

     I'm often asked where I get ideas for my landscape paintings or hand-painted silk scarves. So, here is the story of the genesis of this scarf design. 

     Each of the scarves I make is a one-of-a-kind original. Although I sometimes adapt a previous design in a new color combination or use a motif from a previous scarf in a new way, there are never two scarves exactly alike. In fact, the nature of the hand-painting process makes creating duplicates impossible. The dye flows or blends differently each time; my free-hand sketching with the gutta resist turns out differently; etc.

     For scarf ideas, I keep a file of pages torn from magazines, catalogs, and other sources to page through to get my creative juices flowing. Sometimes, an unusual leaf or flower in nature or something in one of my own photos sparks a design element idea. I also have notebooks with rough sketches or descriptions of ideas that cross my mind. For this rose and grey scarf design, the initial source was a catalog picture of a black knit top with a large white abstract snowflake outlined on the front. Usually I outline motifs in gutta and fill in with a different color or colors than the background. This is the first time I have "drawn" with gutta resist on the blank white scarf but did not fill in the design to contrast with the background. Instead, the white outline stands out against a solid two-color scarf.

     The grey dye used had recently arrived from my supplier, Dharma Trading Company, with a couple of other new colors I'd ordered, and I was eager to try them. Rather than a single background color like the knit top in the catalog had, I thought I'd make a few bands of grey alternating with cranberry or burgundy. Another new color in my order was a darker burgundy with more of a brown undertone than I had expected. So, as I experimented on scrap white silk, I added enough light rose to the burgundy to make a color I liked with the grey.

     So, a new, one-of-a-kind scarf was born. I'll definitely use elements of this design again in other colors, with other motifs, or maybe similar motifs in different sizes or a different layout. Stay tuned. There are always more ideas in my inspiration file and design doodle and thoughts notebooks than there will ever be time to make.

Question of the day: Do you sometimes wonder how ideas for some of your favorite art pieces came about?


Saturday, June 30, 2018

Hand-painted Silk Scarf Gifts--Learning to Let Go

A gift a dear friend chose
     I have enjoyed giving some of my hand-painted silk scarves and landscape paintings to family and friends over the years. Giving is a joy to me, and sharing art I have made is a unique pleasure. Of course, it's a thrill to sell paintings or scarves, but right now, I am not marketing my work aggressively. So, even though I work quite slowly, I have a number of creations to share. 
For a precious extended family member
For a creative friend
For a dear relative who wants to frame it

     Since creating hand-painted silk scarves is relatively new to me, I am still experimenting and learning. Many are not planned for the colors and styles I would wear. Instead, they are created to help me grow in using the medium and to try a variety of colors, designs, and techniques. Today's post shows
a few of the scarves that I have given away. There are a number of others, but  it seems I didn't take pictures of all the scarves I made early on so can't show you all that became gifts.
For a fun college friend--a super reconnection

     It can be uncomfortable for people to be given art pieces that may or may not fit their lifestyle or preferences. Thus, I normally ask first or offer a choice of what is available with the understanding that it absolutely will not hurt my feelings if there is nothing in the current "stock" that the friend or family member wants at that point. There will always be more another time.

     Sometimes (especially with scarves), there are a couple that I really like myself. Occasionally, I am torn--truly wanting to offer the chosen item (or it would not have been among those displayed as possible gifts) and yet finding I don't quite want to part with the particular one someone chooses. It's a good lesson in letting go, and the joy of giving certainly overshadows any small reluctance to say good-bye to my creations.

Question of the day: When has giving been an unusually joyful experience for you?


Friday, June 16, 2017

Soft Aqua Hand-painted Silk Scarf

    I call this 11" x 60" hand-painted silk scarf "Floating" because, somehow, that's how it makes me feel. Like many a silk painting project (at least in my world), I had a somewhat different plan, then let the way the dyes flowed and dried gently change my direction.
Hand-painted silk scarf, "Floating"


Corner detail
     In this case, the first pale layer was intended to be a soft, under-layer and background for an ocean wave inspired pattern to be developed with other hues, some of them more intense and darker. But that layer dried with an interesting sort of scalloped design that begged to remain as it was. My best guess as to why it dried that way is that it might have had something to do with the very watery color mix I used which flowed more in response to the tension points of the pins on the stretcher frame than more concentrated dye mixes do.


Another view of "Floating"
     So, I "went with the flow" and played with salt on the next layer of color to give it a more textured look. Gradually, I subtly deepened and slightly varied the hues. Finally (once it had dried again), I coated the entire edge near the hem with a narrow, but thick coating of salt in preparation to create a lacy edge. With a heavily loaded brush of concentrated dye of a deeper blue shade, I pulled color all along the outer hem edge two separate times. Once it was thoroughly dry, I used an old credit card to scrape all the salt off.
Scarf with first dye layer drying on stretcher frame

     The result pleases me, and I'm glad that I let it happen this way rather than proceeding with plan A. "Floating" still needs to be steam-set and pressed, so looks a little stiff now. When it's finished, the silky softness will return, and the colors will be sharper. Previous posts showing hand-painted silk scarves.

Question of the day: Have you experienced some surprises in your creative projects lately?


Saturday, April 15, 2017

"Falling Leaves" Hand-painted Silk Scarf

"Falling Leaves",  hand-painted silk scarf
     It's spring, but I recently completed a hand-painted silk scarf with an autumn theme and wanted to show it to you. "Falling Leaves" took several months because I was not happy with the way it was turning out and put it away for a time. Once the French silk dye is in the fabric, radical change is not possible--partial modification is the best one can do.

Musings on "failure" in an art project
     
     To be honest, the finished product is still not to my taste. However, I know that it could still be the perfect addition to the right outfit for the right person. 

Close up detail
Close up detail
     So, I refuse to count this scarf as a failure or even to be disappointed in it. For one thing, every art project is a learning experience, and sometimes what can feel like failure has more learning value than a "success". I am still quite new to French silk dye techniques and welcome any opportunity to learn and grow in the art. 

     A second reason comes from the wise words of my acrylic painting mentor, Linda Blondheim. Once, when she was advising me on improving a landscape painting, I had done all that we could think of, and we both still concluded that we didn't like the results. I told her I'd just gesso over it and reuse the canvas. "Oh no, Mary," she said. "This is not an intrinsically bad painting; it's just one you and I don't like a lot. Someone will love it; you wait and see." I've told this story before; that painting sold in a local shop long before others I like much better.

     Oh, in case you are wondering, here's why this scarf will never be a personal favorite (what a ridiculous sales pitch this is turning out to be! not a sales pitch at all--just sharing my thoughts): I had planned the leaf shapes and layout quite carefully and still like them. The background came last, working carefully around the leaves, which had been outlined in a gutta resist to prevent dye flow in or out of the shapes. For some reason, I thought using a couple of colors would look nice and increase the versatility of the scarf as an accessory. Maybe a good idea for some scarves, but for this design, it made for too much going on. In my opinion, that is; others may feel differently, as Linda has taught me to realize

Question of the day: When have you been disappointed in the results of a project only to discover that others like (or even love) the results?

Thursday, September 29, 2016

Ocean-Inspired Aqua, Blue, and Purple Hand-painted Silk Scarf

An 11" x 60" one-of-a-kind, hand-painted silk scarf
     This ocean-inspired aqua, blue, and purple hand-painted silk scarf, 11" x 60", was a delight to paint. I used French-
style silk dyes and began with diluted blue and aqua to paint the large middle area in pale shades, blending well. Just as a clear sky shades slightly from a truer blue appearance overhead to a more aqua look nearer the horizon, I used blue in the very center and shaded to aqua further from center. 


     Of course, I was not trying to make a realistic ocean and sky picture, but hoped to suggest them. In the second stage, I used stronger (much less diluted) hues and began to work on the very ends. The mottled areas result from liberal doses of kosher salt--salt draws wet dye up to create random jagged patterns. What is the area meant to represent? you may ask. I had some thoughts, but mostly wanted some variety in the look of the ends of the scarf. People who have seen it each have their own ideas: currents deep down, the ocean bottom, coral, the movement of sea creatures. Take your pick; it's fun to imagine what shape and texture could represent.

Seen from another angle 

     Working up from the ends, I laid in wavy strips of various shades of blue, aqua, and purple, along with some deep rose. I had some of these shades premixed and ready; others resulted from the colors overlapping and mixing on their own or from adding subsequent tones over the first layer of color. 

     When I approached the "sky" area, I used gutta as a resist (more information here) to draw wiggly outlines for a suggestion of currents and waves (click on any photo to enlarge). Once the gutta had dried, I could continue to create undulating watery tones--using gradually lighted versions of the colors. Since French silk dyes are transparent up to seven layers of color, I could add and modify any of the hues until the result felt right.
The earlier silk scarf, made in my class

     When I originally learned the art of silk painting from Donna Kassab at the John C. Campbell Folk School (see posts about the class here), one of my first silk scarf creations (and still a favorite) was a 22" square ocean-inspired piece. That design sparked the long scarf shown in this post. The square piece looks odd in the photo because it had just come off the stretcher on which we paint on silks (it doesn't actually have a scalloped hem). My favorite aspects of French-style silk painting are the intense colors and the element of unpredictability in the process. Every creation feels like a discovery.

Question of the day: What colors and color combinations are your favorites?

Wednesday, August 31, 2016

Hand-painted Rose, Purple, and Blue Silk Scarf

     I have almost completed 3 more hand-painted silk scarves, all 60" X 11", a nice all-purpose length to tie and wear in multiple ways. This particular scarf was painted without resist, so the dyes were free to flow. I will show you the other new scarves, which did involve using resist to create designs, in coming weeks. For a couple of other examples painted without resist, see this previous post.

Another view, same scarf
     Sometimes, I purposely allow for the unpredictable jagged edges that can form where two different colors come together (especially if one is already dry), which often create beautiful, sometimes unexpected patterns. You can see such edges in the apricot/green 21" square scarf pictured below. 

Professional fabric steamer, about 42" long
     However, I decided to minimize those kinds of edges in this design. One can achieve subtler, smoother color transitions by working very quickly and rubbing adjoining areas with a paper towel. Or, as in this design, one can work wet-on-wet, spraying the white scarf with water before adding colors. For this scarf, I painted the dyes on a wet scarf blank. I experimented with colors and techniques, intending to gradually build up colors to a darker level. Then, the softer, pale colors appealed to me, especially after my friend agreed, saying "It looks like Spring". So, I decided to declare the scarf complete. 

Example of the jagged edges resulting from painting on dry scarf with no blending
     The final step is to steam-set the colors. Many fabric dyes can be set with a steam iron, and some set instantly when painted onto fabrics. But the loveliest and most intense colors, in my view, result from the French-type silk dyes, which must be set in a steamer--either purchased or created by the artist. My generous husband gave me a professional fabric steamer for Christmas--see photo--which greatly simplifies the process (although it is still painstaking and requires several hours altogether). If any of you request more information about the steaming process, I will post more detail in the future.

     Making this scarf was fun. I had only a simple sketch with the idea of color areas and a plan for the dye colors I would use (some straight from the bottle, others mixed for the desired hue). From there, I just spread color freely on the wet silk and watched the design develop--now and then blending the areas where colors came together with a large wet brush or a paper towel. Finally, I brushed on some additional soft contrast strokes and shapes.

Question of the day: In pursuing a hobby or interest, do you prefer trying new techniques and styles or polishing and perfecting your favorite approach?

Sunday, March 13, 2016

Three Hand-dyed and Painted Silk Scarves

     Although I have enjoyed making 22" x 22" square scarves (earlier scarf posts here), I wanted to make long scarves even more. However, it took awhile until I had room for the long stretching frame required to work on them. Here are the first to be completely finished; each measures 11" x 60". 

     Each one was an experiment, as I am still a learner in this art form. The yellow and dark blue scarf was free-painted with no resist to separate areas of color from one another. I first painted the entire scarf deep yellow, let it dry, and then lightly sketched the lattice design in water soluble fabric pencil before painting several layers of deep blue dye in all pattern areas.

     Gutta resist defined the patterns on the other two. The brown, turquoise, and blue color-block scarf first got a coat of very light (watered down) brown overall. Once it was dry, I used a water soluble fabric pencil to mark off the areas according to a scale model design I had sketched out ahead of time. I followed the lines with gutta resist, applied fairly thickly, and let that dry well. Finally, several layers of each color filled the blocks according to my plan. I am pleased with the design and plan to make it again in different colors, maybe pink, rose, blue, and purple.

     The flower design began differently with free-form flowers brushed on the white scarf. Then, I outlined the designs with gutta, staying mostly on the edges of dyed areas to avoid all-white outlines. I deepened the colors within the lines and added a few extra details in the petals and centers. The blue and green background was the last step and gave me fits because of some wayward drips and streaks. Once dye is on the silk, it is there to stay--virtually impossible to remove without streaking the areas around it. So, I gathered up my courage and tried brushing on just water to blend everything, adding just a bit of dye to vary and blend the background colors. Whew! It turned out pretty well compared to the earlier unsightly spots.

     If readers are interested, I will post more in the future about the various finishing steps involved in steam-setting the French dye colors, removing the sticky gutta, washing and ironing the completed scarves.


Question of the day: Do you enjoy experimenting with new crafts or art forms--even the painful parts of watching things go wrong and learning from the process?

Saturday, June 27, 2015

Two Hand-painted Silk Scarves

     I have completed two more hand-painted silk scarves, each 22" square, one in shades of turquoise, blue, and purple and the other deep rose with purple and pearl white. Each has been a learning experience, especially the rose colored scarf. Since I have not made many scarves (other scarf posts here). since my class last year, it is still a trial and error process. But, no complaints--I enjoy both what I learn from the errors and the challenge of making things work anyway.

     The blue blend scarf went fairly quickly (not counting the steam setting of the dyes and the chemical removal of the lines of resist). I blended blue and green to a pleasing shade and quickly covered the entire scarf using a wide foam brush--intentionally varying the shading. Once that dried, I used gutta resist to block off a wavy border and a corner feature of tear-drop shapes. The free-form border blend of colors came next (after the gutta had completely dried) followed by filling in the tear drops. Going over some of the areas again deepened the color--or using a different shade, changed the color subtly. Sorry there is no photo of the entire scarf--am in a rush, and it is too wrinkled to look decent laid out flat (how lazy is that?).


     I'll spare you the tortured tale of trial and error on the rose scarf, but again, I started by painting the entire scarf--this time in a rose color blend, both to serve as a background and to ensure that the later gutta outlining would not be stark white. Since it turned out darker than desired, I "lifted" some color with a wide brush filled with water. Then: let it dry, gutta outlines for the leaves and iris flowers, let it dry, paint layers of purple, and several different green shades in the leaves and flowers, and make a narrow purple border. Finally, I made the lily of the valley flowers with Jacquard Luminere pearlescent fabric paint (which comes in small bottles and can be squeezed directly onto fabric from the bottle tip). Keeping a toothpick in the other hand, I quickly pulled the paint up twice each time I made a flower "drop" to form the little pointed petals (as always, click on any photo to enlarge it and see more detail). The alcohol spray spots and little random whats-its on the scarf were attempts to camouflage drops of dye and other oopsies. I also wanted the variation in texture of the alcohol spotting. Overall, not bad. The color is so lovely, it's hard to hate the result.

Question of the day: What would we do without color?
     

Monday, December 8, 2014

Around the World Blog Hop Entry--My Creative Process

   
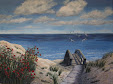
Outside a back yard at Jacksonville Beach, FL
I was invited to join an Around the World Blog Hop (google that and be amazed!) by fellow artist Mary Paquet, whose work and blog I always enjoy and admire. Please visit Mary Paquet's blog to see for yourselves and for her Blog Hop entry on December 1. In turn, I have invited Jo Castillo, a delightful, talented artist and prolific blogger to post on Monday, December 15. All the past blog hop entries I have visited are fascinating as a variety of artists each answer four questions about their work and creative process.

     The invitation is welcome both because 1) I am a relatively new artist and 2) my blog is a mix of posts about both acrylic landscape painting and silk scarf painting AND lots of other aspects of creative living, including travel, cooking, exploring coastal North Florida, and more. I am honored that more established artists with more art-focused blogs to include mine. Thank you, Mary Paquet. My thoughts on the questions appear below (and, to spare you a truly endless post this time, will continue in a second post in a few days). Here and there a link will take interested readers to related posts on this blog. 

1) What am I working on? After a break from art due to travel, time with family and, well, the rest of life, I have several projects going now:
Matanzas River Bend
  • finishing touches on a gift for a friend--a 12" x 6" piece picturing a Matanzas River scene, just off the Atlantic Ocean. My friend has always loved the Matanzas Inlet area, near St. Augustine, Florida.
  • deciding what's next on a half-finished silk scarf with a purple iris motif; it needs more tonal contrast and/or some other revision (not pictured--stay tuned).
  • designing and making a scarf for a friend who wants it as a Christmas gift for someone special to her. She has a color scheme idea, and is trusting me for the rest. How scary is that?
  • A favorite scarf, painted in March
  • Finally, something new for me, planning a couple of paintings based on photos and memories of a recent time in Tuscany. Normally, I interpret scenes here in coastal North Florida because I know this area in depth. Can I capture the essence of a place only visited? Perhaps not, but I am hoping to convey my own impressions and appreciation of its beauty.
2) How does my work differ from others of its genre? Most bloggers, including me, regard this question as a stumper--hard to answer for oneself. Even some relative strangers have said that once they see a landscape I've painted, they recognize others as being my style, so the work does have distinctive elements. However, defining those elements is difficult. I'll mention a few common threads in most of the landscapes. Making scarves is simply too new for me to have developed a personal style; "experimenting" is the current mode in silk painting. (See posts on the week-long "art camp" silk painting class I enjoyed).  My landscape paintings usually include:
Another silk scarf favorite

  • A realistic style--although I "edit" actual scenes for good composition; they are far from photographic.
  • Many portray out-of-the way places that most people would pass without noticing. Prowling back roads, urban pocket parks, and nature preserves with my camera, I find quiet charm and beauty--painting ideas abound.
  • Water appears in a fair number of works. Here in Jacksonville, Florida, we enjoy the Atlantic Ocean (from a surprising variety of beaches), the mighty St. Johns River and a number of other rivers, quirky creeks (some of which would be called rivers in other regions--they are wide!), still ponds, and our bewitching, ever-changing salt marshes. I love both being near natural bodies of water and the challenge of painting water.
  • Marsh in Fort Caroline Preserve
  • Finally, the works reflect an effort to establish a clear focal point and visual path for the viewer.
Clear focal point, "Summer Reflections" 
3) Why do I create what I do?

4) How does my creating process work?

This post is long enough, so--hoping the blog hop police won't mind--I will post again in a few days with consideration of the last two questions.

   Don't forget to visit the delightful blog of fine artist Jo Castillo, who has agreed to be "tagged" as the next Monday blogger in this creative chain. Don't miss her post on December 15! 

Again, I am truly thankful to Mary Paquet for providing this opportunity. Given the many incredible blogs I have discovered following the chain from one creator to another, it took real self-discipline to stop browsing and post on time :).


Question of the Day: What are some delightful discoveries of people/ideas/visuals/blogs you have encountered recently as you browse the web?    

Monday, April 7, 2014

Painting Silk Scarves Without Using a Resist Agent

     The two silk scarves pictured today are among several I made at "art camp". These two have been especially usable and fun to wear; they each coordinate with many outfits and brighten neutral-toned tops. Changing the corner that shows or tying the scarf in different ways features various colors according to whatever section of the scarf best complements an outfit.


     I did not use any resist agent to control the flow of dye in these two pieces. In other words, the dye was brushed straight onto the unpainted silk scarf and allowed to diffuse and spread naturally. Each stroke blends with other dye colors that have been brushed near them, often creating unplanned effects and varied edges (some jagged-looking, some smoother). These effects are delightful to watch and are both fun and challenging to work with in silk painting design. The rest of the post describes the painting process--including the use of salt and alcohol for special effects--for interested readers.

     The multi-colored scarf with yellows, oranges, and reds predominating evolved from my original plan to a somewhat different design. After blending each of the dye colors I wanted to use (in small cups), I began to brush the gorgeous colors in strips from the edge of the scarf toward the center. As you can see in the photo below, I did not bring the colors all the way to the center at first. To deepen the colors, I painted over some areas again once they were dry--sometimes with the same color, sometimes blending in another color. Then, as the final version of the strips of color dried, classmates began to comment on the design, calling it "like fire" or "fireworks". So, I went with that, rather than with the autumn theme in my mind (don't ask--it would be boring to try to explain). I completed the center with a burst of "fire", taking advantage of an interesting property of yellow dye. As our teacher, Donna Kassab, had shown us, yellow dye (who knows why) tends to "push" other colors back a bit in the silk. The yellow and yellow-orange blend in the center performed their magic and created an interesting jagged edge in the process. A bit of salt created some variation in the center (see next paragraph for more on using salt). Fun stuff!


     The green and blue scarf went even more quickly. I brushed the entire scarf with slightly varied green tones as a background. Once that was dry, I began in the center with ultramarine blue and brushed a large spiral shape (leaving a fair amount of open space). Then, I brushed shades of turquoise next to the blue, again leaving some space for the background green to show. Finally, for the "special effects"  of spots and mottling you see, I sprinkled the wet surface with table salt and some chunky sea salt here and there for variety. Lightly spraying alcohol from a couple of different angles completed the piece. Both the salt and alcohol continue to work until the silk is completely dry, either drawing the dye in (salt) or repelling it (alcohol drops). So again, the process took on a life of its own, partly unexpected, although--since I had some experience with the materials by that time--partly as I had hoped and expected.

Question of the day: Do you prefer creative processes over which you (at least mostly) exert some control, or do you enjoy using media which to some degree, drive the creation in unexpected directions?