I have worked a long time on a new post to show you another new hand-painted silk scarf. But Blogger has a new "interface" that does not work right. The new post keeps getting chopped off when I try to publish the post no matter how many times I have saved my work.
Is anyone else having trouble getting a complete post to publish? Do you have any suggestions for me? I will probably not be able to work on the post again for a couple of weeks, but I hope to come through with something for you then.
Thursday, July 30, 2020
Rose, Pink, and Grey Hand-Painted Silk Scarf Using Shibori Technique
 OK, things are working better, but I don't know why this post appears after my earlier frustration rant. Today's date is August 31, 2020, and I'm thrilled to be able to communicate with you again.
 I am enjoying some new French silk dye colors and chose this combination of colors--rose, pink, and grey--to see how the new pink works. As expected, the rose is powerful enough to partially invade areas I had planned to be pink, but overall, I am very pleased with the results. Given that I don't look great in strong rose tones, this is a scarf made for someone else. We'll see who that turns out to be.
 |
| Close-up detail near one end |
Japanese shibori techniques like this one require a fair amount of preparation; then the actual application of the dyes goes quite quickly. For this design, I press lengthwise accordion folds in the scarf--in this case dividing the 11" width into fourths. In my first try--very much a learning experience--with this particular shibori design, I divided the scarf width into sixths. Making four folds works much better for the 60" x 11" scarf. After the four long accordion folds, I made angled folds in alternating directions and pressed them in.
 |
| Detail near other end |
Finally, I soaked the folded strip with water to help disburse the dyes and applied my chosen colors with well-loaded brushes, pushing the dye into the folds. A more complete description of this particular shibori process to create a brown, rust, and beige scarf is in a previous post.

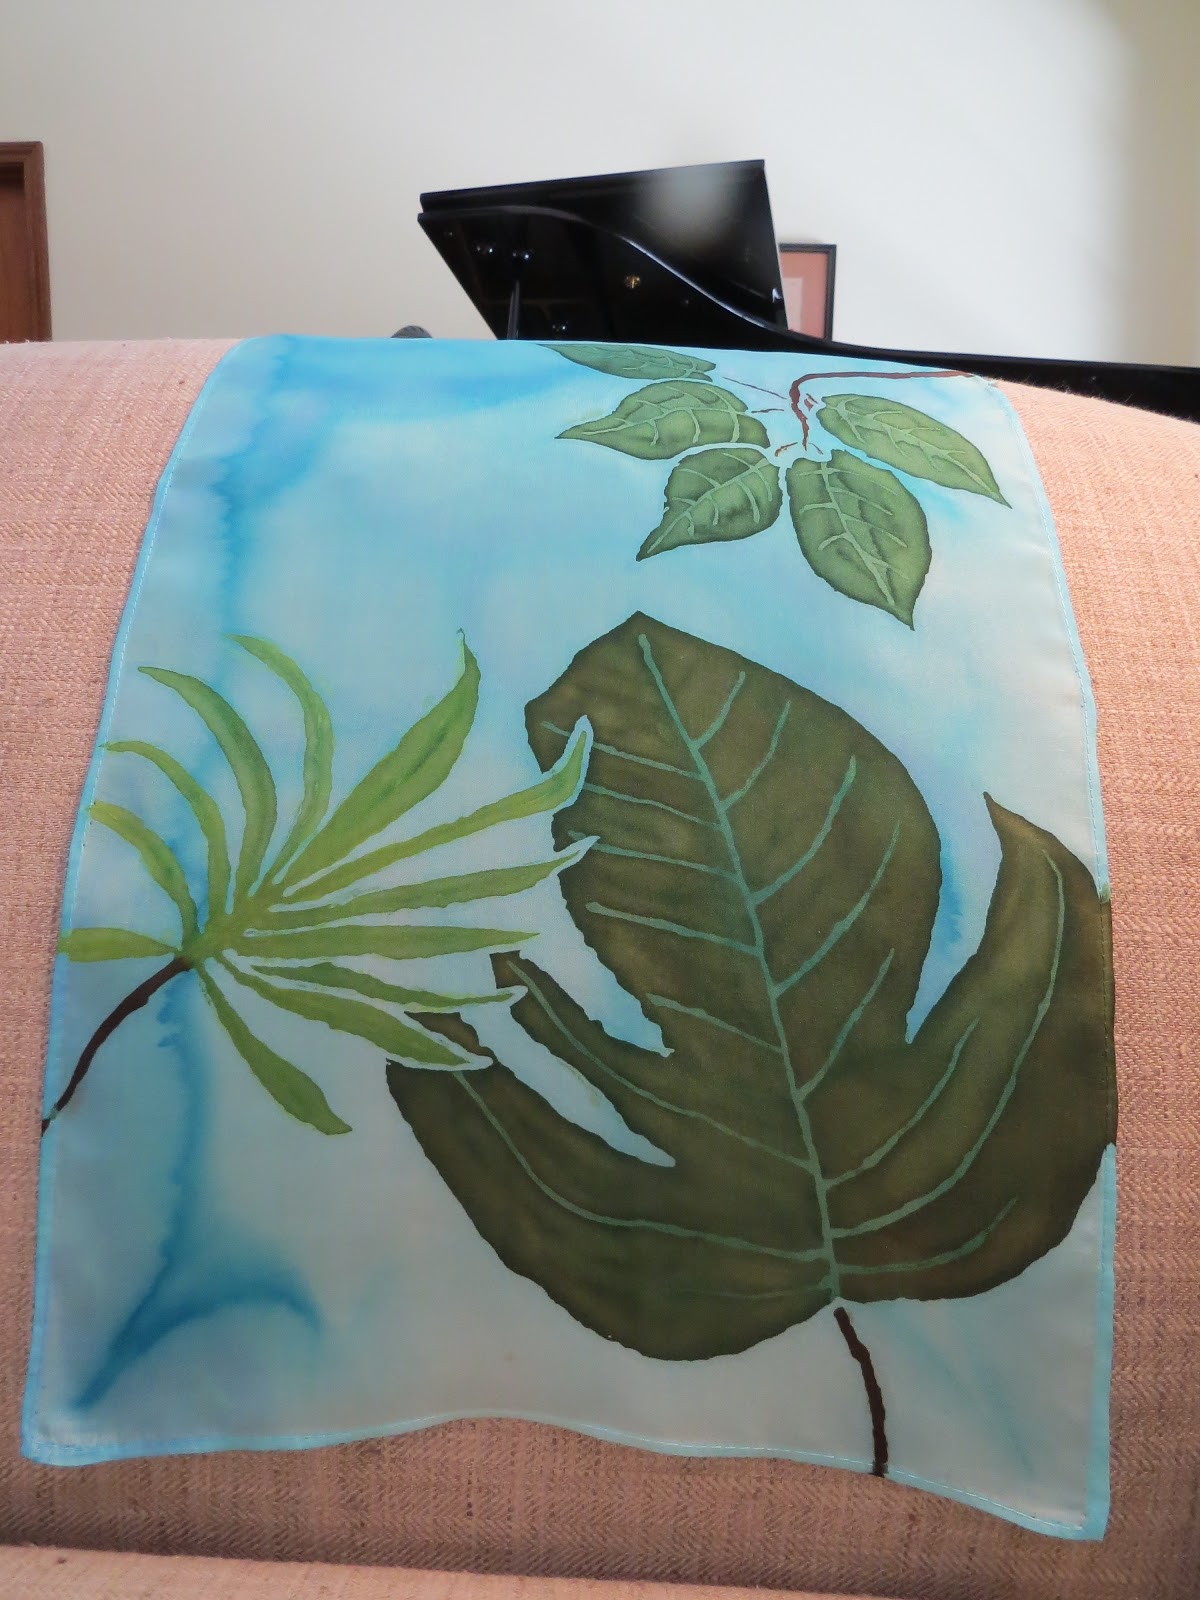 For my wonderful blog friend, fine artist, and creative woman with a super sense of fun, Jo Castillo, here are a couple photos of another scarf. Since I couldn't wait to post it, this tropical leaf design scarf appeared before the final processes were completed. Jo Castillo commented that she would like to see how it looked once the gutta resist outlines were soaked out. It is shown below, although the colors are a bit stronger than in these photos; they show up better in the older post. Thank you, readers, for your continued comments and interesting reflections.
Question of the Day: What are your favorite wardrobe colors?
Monday, June 29, 2020
Orange, Red, and Gold Hand-Painted Silk Scarf Using a Shibori Technique
 If I had kept track of the time spent making this 60" x 11" scarf, you might be surprised. It was more complicated than you would guess. This is the first time I have made a scarf using the arashi shibori technique (arashi means "storm" in Japanese--maybe referring to the wavy patterns' resemblance to thin clouds). A library book called Shibori by Elfriede Moller was my guide, although I modified her technique some. Here are a few scarves I made with other kinds of shibori techniques.
Using a chunky foot-long piece of PVC pipe, I attached the 11" end of the blank white silk scarf near the top with masking tape. The two corners did not overlap; this allowed for just one layer of the scarf to wrap around the pipe. Then, with pale crochet cotton tied around the pipe and secured with tape (this can be done with thicker string or any thread as well), I wound the crochet thread around the scarf on the pipe many times in a random pattern. After a section was wound with thread, it was scrunched up and the next section wound--until the entire length of silk was tightly gathered on the pipe. The tape had to come off so that it did not block the dyes.
Tying off the end of the thread, I then wet the silk well so that it was soaked through but not dripping wet. This helps the dye to spread, to blend, and to penetrate the folds. Then, with a dropper and sometimes a brush, I pushed a few colors of French silk dyes into the fabric. The technique allows for many variations; the internet has a number of examples if you'd like to see more. My goal was to color the entire scarf, but other artists leave white areas. The silk can also be folded and then wound onto the pipe. Depending on the pattern of the folding, the wavy stripes can run in more than one direction when the piece is completed (here is one example).
Once the piece is dry (24 hours or more), you can snip the string or thread and enjoy the big reveal. I used four dye colors, but found that one dominated the resulting scarf. The colors are called grenat (a brownish red), ruby, orange (a blend I made of coral and a bit of yellow), and a sort of gold (a blend of yellow and a bit of rich sienna). As you can see, the coral blend took over many areas--not really surprising since it has proven to be quite strong other times I've used it. Yet, the result did surprise me. So this project was a learning experience and an adventure that will help guide the next time I use the arashi shibori technique.
Question of the day: Do you enjoy experimenting with crafts or other projects--even when you don't know how they will turn out?
 |
| Close-up detail |
 |
| Close-up of the other side |
Once the piece is dry (24 hours or more), you can snip the string or thread and enjoy the big reveal. I used four dye colors, but found that one dominated the resulting scarf. The colors are called grenat (a brownish red), ruby, orange (a blend I made of coral and a bit of yellow), and a sort of gold (a blend of yellow and a bit of rich sienna). As you can see, the coral blend took over many areas--not really surprising since it has proven to be quite strong other times I've used it. Yet, the result did surprise me. So this project was a learning experience and an adventure that will help guide the next time I use the arashi shibori technique.
Question of the day: Do you enjoy experimenting with crafts or other projects--even when you don't know how they will turn out?
Tuesday, May 12, 2020
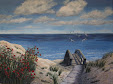
Westward Ho! Yellowstone's Mammoth Hot Springs and Terraces
 A cabin at Mammoth Hot Springs was our second "home" in Yellowstone National Park. The cabins (and newly refurbished hotel) are part of a hub toward the northwest corner of this huge park. The hot springs and extensive natural travertine terraces formed from dissolved limestone are fascinating. Over a mile of boardwalks allow visitors to explore them safely. Our day for exploring them and other nearby thermal features was chilly, grey and sometimes forbidding looking, so my photos show a completely different reality from the gleaming, pearly look of the terraces in bright weather. Of course, you can click on any photo to enlarge it.


 The Mammoth region is home to some of the largest herds of elk in the park as well as a variety of other wildlife. We had seen a few female elk in meadows in other parts of the park, but we were not expecting the number of elk we could watch in Mammoth. Nor were we prepared for the degree to which we saw some of them "up close and personal". We had been as careful as possible to stay the recommended distance away from wildlife, but in our cluster of cabins, the elk came to within eight feet of us. Between six and eight does and yearlings regularly grazed on the green grass the cabins surrounded--guess it was sweeter than the sagebrush on the hills around us. A number of others settled in around the cabins--one large doe even blocking access to our rented vehicle for awhile one morning.
  Since we visited in elk rutting season, we could hear the bucks' eerie high-pitched bugling at night. Several bucks were gathering harems in the area--one group hanging out often in Mammoth Village (cluster of ranger station, camp store, hotel, restaurants, etc.). Cars stopped, and some people came much closer than was safe to get the perfect photo--a challenge for the rangers to manage.
I have been puzzling over how to adequately express our awe and fascination with the natural wonders of the Grand Tetons and Yellowstone. We are thankful to have had the opportunity to spend some time there. Since we were already near the Northern edge of the park, I had arranged for us to fly out of Bozeman, MT rather than drive all the way back to Jackson, WY. Oh my, we wished we had had a few more days in Bozeman as well. It's a hip, cultured college town surrounded by breathtaking mountains. After a quick lunch and stroll in town, we visited the amazing Museum of the Rockies, arriving just in time for a visiting production of Mongolian music and dance in dazzling costumes. The accompanying extensive exhibit featuring Ghengis Khan was eye-opening. I had not known that the fierce, brutal warrior became a progressive (for that time) leader. The museum's permanent exhibits include a stunning variety of local dinosaur finds and Native American art.
Our itinerary worked well for us. We appreciated our time in Jackson, WY, and thrilled to the Grand Tetons. We were glad we had reserved rooms in two different corners of Yellowstone's expanse so that we could visit varied areas and features in a leisurely way without driving greater distances. You can view previous posts about our trip here. I hope you have the same opportunity some day.
Question of the day: Can you sometimes recall particular travel moments and experiences as vividly as if they had happened that day?
Saturday, March 7, 2020
Westward Ho! Part III. Yellowstone Thermal Feature Guided Tour
 |
| Nope, this is Fountain Geyser, which erupts on an irregular schedule |
 |
| Fountain Geyser and its small twin in back |
 |
| We were lucky to catch their eruption |
 |
| Heart Spring |
 |
| Microbial mats make the colors on the ground |
 |
| The mineral rich waters feed the microbes |
The tour was amazing, completely exceeding our expectations. Our guide shared his passion for Yellowstone's unique bubbling mud pots, geysers, hot springs, and steam vents, providing a wealth of fascinating information about the geology of the area. Driving our group in a restored 1938 yellow White Motor Co. bus, he answered a range of questions, provided bird and wildflower charts for those interested, and entertained us with stories of events from the amusing to the tragic that had occurred in this dangerous terrain.
 |
| The walls of the rapids came from lava flows |
 |
| Falls in Firehole Canyon |
 |
| Our funky bus, with hubby in the foreground |
Wednesday, January 22, 2020
Two 4" x 5" Flower Paintings

Clearly, landscapes come more easily to me, but the learning involved in these studies was worth it. Flowers come out better, I think, when they are not over-worked--with just a few brush strokes in just the right colors. Highlights add depth, but multiple layers of acrylic paint do not necessarily add anything, rather seemed to detract. I'm sure there are countless gorgeous flower paintings by accomplished floral artists that would prove me wrong. So maybe what I should say is that in a small piece, what would work better at least for me would be surer quicker strokes than I used on the hibiscus. They say live and learn, but I often need to try something new, make various mistakes, and learn. Since no one is grading the efforts, it's fun and refreshing.
The individual flowers that make up the astilbe plumes are too tiny to overwork, so that piece pleases me more. There is some layering, beginning with a slightly bluish white, finishing with slightly yellowed white (for the warmth) toward the tops of the plumes and some pure white highlights. I used a fan brush, pressed into the paint so that the bristles were nicely separated and dabbed away in a "plumey" pattern. For each piece, I had looked at photos in my husband's gardening and botanical reference books. We had a hibiscus in the back yard at the time I started that painting, so could use my own photos as well (the hibiscus was not blooming at the time, but I had studied them up close often enough to draw on memory too).
Question of the day: What new thing have you tried lately and what did you learn doing it?
Subscribe to:
Posts (Atom)