Showing posts with label composition. Show all posts

Thursday, July 19, 2018

A Favorite Painting Technique Book


     The Simple Secret to Better Painting by Greg Albert inspires and teaches me something every time I pick it up. This book comes home from the public library every now and then so that I can find a new idea in it--or remind myself of helpful ideas that are easy to forget as I paint. 

     Today's post is rewritten from an entry I made in 2013. This super book came to mind today as I drove to the library, so I picked it up while I was there and decided to post about its wisdom again for new readers--and longtime readers as well.

     Greg Albert's "simple secret" is the wonderful lesson of variety within balance, which I consider a metaphor for a meaningful life as well as a basic principle for painting and other visual arts. His simple secret, which he calls the one central rule for design is: "Never make any two intervals the same." There is a wealth of valuable information contained in his applications of this rule. If you have any interest in the visual arts or in any facet of design, this book is worth reading and rereading.
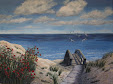
"Sea Oats"

     Mr. Albert uses painting examples to expand his simple rule to intervals of distance, shape, tonal value, color, and more--no sort of interval should be the same, he maintains. This advice is helpful at all stages of a creative process. Here's an example. One of my recurring mistakes is to paint too much in mid-tone values--without fully realizing it along the way--rather than to include enough areas of more intense dark and very light values to balance the mid-tones. 


     In my more recent paintings, I started with a tonal value sketch, but sometimes still ended up with insufficient contrast. During my revision process, the value range often has needed to be extended. Mr. Albert's rule is a reminder to include a broader value range as well as to make sure that the areas (or "intervals") of dark, light, and mid-tone should not be the same in overall size. A previous post about a painting called "Sea Oats" shows one example of revision that included adding some very light clouds and brightening light areas on a dune as well as deepening just a few very dark highlights.
Hanna Park reference photo
"Hanna Park Heron"

     Another painting that required some added interval variety was "Hanna Park Heron"  (the colors in the photo of the painting are less intense than in the actual painting), shown here with the original reference photo (more about this painting was posted earlier also). Notice how the reference photo's background vegetation repeats types of plants, shapes, colors, and sizes equally--not ideal for artistic composition. Then, notice the additions of the two light grey dead trees to change that sameness and to provide strong verticals across from the large palm trunk. You will be able to spot other changes from the reference photo and to consider my possible reasons for them.

Question of the day: What does an idea like "variety in balance" bring to mind for you?


Friday, March 31, 2017

Landscape Painting -- "On the Jones Creek Trail"

"On the Jones Creek Trail"
 My newest acrylic landscape painting, "On the Jones Creek Trail", on 16" x 20" gallery-wrapped canvas, was inspired by lovely walks in the Jacksonville Arboretum and Gardens with my husband and little Shih Tzu dog. The memories and photos used as reference material (one of them shown below) span several visits, and this painting is a composite of scenes along one of the trails, which weaves in and out of a woodsy area, with many views of Jones Creek. Here in coastal North Florida, natural vegetation can grow so thick that I need to "clear out some underbrush" to create a pleasing, balanced composition for painting. However, what is included in the painting is truly growing near the creek in this amazing park within Jacksonville, Florida. 
 

     Our city is blessed with a wealth of parks, preserves, and nature trails. The arboretum was rescued from unused land owned by the city (which had acquired it after a mining company had strip-mined it for materials used to make titanium). Although illegal dumping and the residue of mining had compromised the area, some citizens could envision its future as an arboretum and natural recreational site. You can read more about the delightful park it has become and see photos here. My husband, a master gardener and member of the North Florida Native Plant Society, worked on clearing and planting projects with many other volunteers. My previous posts about visiting the arboretum also show its uniquely North Florida beauty.
                                                                                     
One of the reference photos used in painting
     I used a mostly cool palette for this painting because it represents a transitional season toward the end of winter, when vegetation here is more subdued in hue than in spring and summer. The acrylic paints used include cobalt, cerulean, Payne's grey, lemon yellow, yellow ochre, burnt umber, and titanium white with a few touches of naphthol red to temper and vary the greens.

     I hope you enjoy taking a walk in the arboretum with me.

Question of the day: What kinds of natural environments have been restored and preserved in your area?

Sunday, November 22, 2015

Painting of an Egret

"Silent Stalker"
     The painting, "Silent Stalker", shows an egret in one of our neighborhood ponds standing motionless waiting for a frog or small fish to come within striking distance. It had been wading very slowly and (fortunately for me and my camera) then waited in utter stillness for quite some time. Unfortunately, I could not stay long enough to see it actually spear prey.

     After preliminary decisions about the composition and palette, this 12" x 16" acrylic piece on gallery wrapped canvas moved along fairly quickly whenever I worked on it. However, due to several interruptions--especially time spent working on a large sunrise painting for our son and his wife--the egret piece was set aside a couple of times.

     In some ways, it is less refined than most of my work, and I anticipated at least several more hours of work when I put it back on the easel to give myself a break from the large piece. However, after some adjustment of the shading in the egret's feathers and subtle increases in the contrast of lights and darks in the foreground, it was pleasing as it was. It hung in the studio for a few days for me to look at now and then--and still it seemed right just the way it was. Sometimes it is very difficult for me to decide when a painting is done and to avoid the temptation of refining the life out of it trying to make it "perfect". For once, deciding to stop was not too hard. 


Main reference photo
     The main reference photo reveals the minor simplifying changes I made to the composition as well as greater changes made to enhance the colors. This represents a very common scene all over our coastal North Florida region. We love our beautiful, graceful wading birds.


Question of the day: Are you ever tempted to "overdo" or to be too perfectionistic in a project of some kind?

Saturday, August 29, 2015

Hanna Park Heron painting

The Painting
This post is repeated from 2010 as I feel nostalgic today for this particular painting. Although I was thrilled that it sold to people who love it, both for itself and for its power to remind them of family outings to Hanna Park over the years, I still miss it at times.

The reference photo for this painting was a quick, drive-by snapshot of a great blue heron at Hanna Park Lake here in Jacksonville, Florida. As I studied that photo and others taken that day of the heron, the lake, and the surrounding trees, I knew that I could base a painting on them. But, just how should I compose the painting? Unlike some scenes, the focal point in this one chose itself. In spite of the appeal of dark, shimmering water, tall palm trunks, and jungle-like vegetation, the heron clearly draws the eye of the viewer. I felt certain, in fact, that the heron itself knew that he (or possibly she) had no competition for the starring role in this little tableau.
Reference Photo

In preliminary sketches, the main issues I worked on concerned how to arrange the elements--how much yellowed grass in the foreground? where to place the major horizontal elements? how much vegetation area in comparison to the water? And of course, just where to place the heron? In the photo, it is too near the center and is looking out of the scene--clearly unsatisfactory. Some of the other elements could stay more or less as they were in the photo.

The major change from the photo to the painting may not be immediately obvious. I decided to move the sun. The relatively short time we spent at the lake that day gave me no choice about the lighting, and I took photos with a bright overhead sun. However, I wanted more dramatic shadows in the painting and moved the sun, first to a point low in the sky behind the background trees and palmettos. Then, halfway through the painting, I moved it again--higher in the sky to the viewer's right. What fun! There is such power in creative projects--I can move the sun itself. However, the fact that I changed the light source as I worked caused a fair amount of readjustment in the painting along the way, as you artist readers can well imagine. Luckily, working in acrylics allows me to paint over nearly anything, which saves me and my paintings every time.

You will notice other differences from the reference photo. The background vegetation gradually took on a life of its own and became a sort of jungle fantasy instead of a literal rendering of what I had seen. Also, I realized late in the process that the varied greens in the background, despite touches of blue, yellow, and rusty browns, needed to be broken up by some other color. Given that there were winter-bare branches and dead trees nearby, I felt free to add a few fallen branches and to import a pair of dead trees from another scene. They help the overall composition in more than one way, I think, as they also echo the grey tones of the heron and add one other distinct vertical.  
Question of the day: When you pursue a creative endeavor, do you normally begin with a clear vision of the final outcome and then create that? Or do your creations change along the way? Are you comfortable and flexible if your original vision changes as you work?

Saturday, December 13, 2014

Blog Hop, Part II--My Creative Process

A great blue heron, seen at  Jacksonville's Hanna Park
Somewhere in Michigan (a scene from memories)

     Thanks again to Mary Paquet for the invitation to contribute to the blog hop project by responding to four questions. I continue here with the two last questions (see my previous post for Part I). And don't miss Jo Castillo's post on Monday, Dec. 15; I "tagged" her to be next in the blog hop and know that you will enjoy her lively creative sense and fine art works.

3) Why do I create what I do?

     I have always enjoyed sewing, knitting, and crocheting, but did not believe I had any talent for the visual arts I so admired. My love for color and for the beauty of the natural world kept tugging me toward giving landscape work a try.
Castaway Preserve Cedar
Castaway Preserve Palms

     Finally, about 11 years ago, I signed up for a week-long class in acrylic painting at the John C. Campbell Folk School in North Carolina--expecting to enjoy playing with color and making creative messes, then to toss them and return home renewed and relaxed. Well, with an excellent teacher and time to practice and learn, I painted pieces that I really liked. No tossing occurred, and I was hooked! Now, with more workshops and lots more practice behind me, some pieces even sell. More importantly, I find continued delight in creating acrylic landscapes and learning more all the time. Another Folk School class this year started me in silk painting as well--a fluid, often unpredictable medium that gives me additional pleasure. Creating art is a whole new world for me and a rewarding pursuit in semi-retirement.
Jacksonville Beach
Jacksonville Beach

4) How does my creative process work?

     While considering this question, I used the little search box at the top of my blog and entered "painting process". Oh, my--I have written many posts that include discussion of the creative process in general and of the particular processes involved in individual paintings or silk scarves.
An early work--A favorite retreat near Warwick, NY

Silk scarf (using resist)
Silk scarf (natural blending--no resist)
     So, what are the common threads in varying processes for individual pieces? For processes in making the silk scarves, please see recent posts on that topic.
     
     Nearly all landscape paintings begin with a photo or a cluster of reference photos. Since I am endlessly fascinated with coastal North Florida scenes and want to convey the beauty and serenity I find in exploring out-of-the-way places in this area, I study angles of light, color (how to capture the incredible range of greens?!), and take notes to accompany the photos I take from various angles and distances.

     In the studio, the next considerations are composition (including tonal balance--the lights and darks) and color palette. In our area, good composition almost always involves leaving out some of the lush growth and sometimes other elements. Sketching--very roughly--a few possible versions of a scene, sometimes moving the point of view or focal point, helps me decide on a final version. Here are some previous posts that discuss composition.

     Choosing a limited number of colors helps both in unifying a painting and still gives an incredible range of possible hues. I don't try to match the actual scene so much as try to capture a feeling while staying in a realistic color range. Sometimes I go for low contrast and cool serenity, sometimes warmer, lively vistas. Again, here are some previous posts with more about color and palette for interested readers.

      Revision is the other most crucial piece of my process. The beauty of acrylics (especially for a learner like me) is that they dry quickly and cover well. I can paint over an area that does not please me, take out a superfluous bush, or whatever. Sometimes before a major change, I try it out by cutting a shape out of construction paper that approximates the change, tape it to the canvas, and squint to judge the effect on the composition.

     When wrestling with a piece that is not cooperating, it helps to remind myself that any work is a valuable learning experience (taking myself too seriously is fatal). At times, I put a painting away for a time and work on something else. A fresh look later on often yields a solution.

Question of the day: Do you enjoy hearing about the creative process or watching artists work? Or would you rather simply experience the art for yourself with no background or explanation given?

Sunday, June 30, 2013

"Summer Clouds" - A Characteristic North Florida Scene

"Summer Clouds" by Mary Lemmenes
     Several summers ago (in fact, looking back, it was in 2007!), I took the dog out for a walk and ran right back in for my camera. The towering clouds to our south were amazing that day, although in coastal North Florida, our changeable skies are often stunningly lovely. This view would make a fine subject for a painting, I thought. You can view the original  reference photo below.

     Translating that neighborhood scene to a painting took longer than I had anticipated, but "Summer Clouds" is finally ready to show you. The 18" X 24" acrylic painting, seen on the right, is on gallery wrap canvas and can be hung without a frame--or can be framed if one wishes. The detail photo illustrates some particulars discussed below for readers interested in technical aspects of the work.
Close-up Detail 

     The two major challenges in this piece were: to create an interesting foreground and to convey an adequate impression of the cloud formations. First, although our neighborhood street is attractive, I did not want to use a city street and houses as a foreground. So, I imagined, sketched, and sketched again until a composition plan  seemed workable. I wanted the clouds to "star" and worked to avoid upstaging them with the foreground. Yet, the foreground seemed to need more than just a vague suggestion of ground and foliage. A single tall, dark loblolly pine on the left (balanced by a birch on the right) is a clear contrast to the bright clouds as well as giving some character to the land (the models for these particular trees live on other streets in our neighborhood). In fact, the area where the pine stands against a bright cloud area emerged as the painting's focal point, which Anthony Whiting taught us in recent painting classes is either the darkest dark next to the lightest light or the brightest color in a painting.

     Secondly, painting the clouds as you see them here required gradually building them up in many layers. They cannot be done with a heavy hand (at least, in this style of painting) and yet needed to look as impressive and substantial as they appeared that summer day. They also needed richer color variation and play of lights and darks than we can see in cloud photos.
Reference Photo, Jacksonville, FL

     The acrylic paint palette for this piece includes: Paynes grey, ultramarine blue, cerulean blue, cadmium red light, sap green, yellow ochre, and cadmium yellow light as well as titanium white. When I asked Anthony Whiting for advice as it was nearly finished, he suggested a color mix for the under side of the clouds I never would have dreamed of or tried on my own: alizarin crimson and veridian green--with white as needed. Normally, red and green blends create a brownish neutral or even a rich, true brown (depending on the tones of the original hues), but I was amazed at the warm, rosy purple-grey this blend created. Thanks to Anthony for that! I left some of the shadowed cloud areas of greys and bluish greys I had used originally, but adding some of the new blend (in my view) enriched and enlivened the cloud layers.
Question of the day: Isn't the sky beautiful and miraculous, and isn't the variety in sky scenes across our great land a gift to see?

Friday, March 8, 2013

Painting a Water Study--View of Goodby's Creek

     I explored Goodby's Creek, which is a few miles from our north Florida home, and took photos for landscape painting subjects a couple years ago. Recently, I pulled out one of the less dramatic views to paint because the ripples at the edge of the water intrigued me. This 8" x 10" study attempts to capture the feeling of that spot, of overall quietness with gentle, leftover movement in the water from some earlier disturbance.

     Although it is "just a study", not a fully realized painting, this creek view was challenging and required several revisions. I am pleased with the results, with the overall "feel" of the piece. I plan a few minor changes, but wanted to show you this nearly finished stage before coming into a time that will be too busy for any posting.


     For those of you interested in the technical details, the support is a canvas board. The acrylic paint palette included cerulean, cobalt blue, paynes grey, alizarin crimson, cad yellow light, yellow ochre, burnt sienna, buff, and titanium white. Wanting a cleaner look than the actual, quite wild creek bank vegetation, I left out a fair amount and gave the viewer some glimpses of the sky. The painting also increases the light/dark contrasts and highlights the stand of pampas grass and a few other elements. See the original reference photo below for comparison.


Question of the day: Are you inclined to reflect on the features in a scene which interest you and draw you in--or are you more inclined to simply enjoy natural beauty on a feeling level? Or--like me--sometimes one, sometimes the other?

Thursday, January 31, 2013

A Favorite Book About Painting--and Life

     The Simple Secret to Better Painting by Greg Albert inspires and teaches me something every time I pick it up. This book comes home from the public library once every few months so that I can find a new idea in it--or remind myself of ideas that are easy to forget.


     Greg Albert's "simple secret" is the wonderful lesson of variety within balance, which I find a metaphor for an important secret to a meaningful life as well as to painting in ways that (hopefully) delight viewers. I hope he would not mind me mentioning his simple secret, which he calls the one central rule for design: "Never make any two intervals the same." Trust me that there is so much valuable information contained in the way Greg Albert spells out applications for this rule that I cannot and will not "give away" his secret in this brief blog post. If you have any interest in the visual arts or in any facet of design, this book is worth reading and rereading. I think its possible applications go way beyond painting alone.

     Mr. Albert uses painting examples to expand his simple rule to intervals of distance, shape, tonal value, color, and more--no sort of interval should be the same, he maintains. This advice is helpful at all stages of a creative process. Here's an example. One of my recurring painting mistakes is to trend too much toward mid-tone values, rather than to include at least small areas of more intense dark and very light values. I have no idea why that happens (an excess of caution, maybe?), but during the revision process, the value range often needs extending. Mr. Albert's rule is a reminder to include a broader value range as well as to make sure that the areas (or "intervals") of dark, light, and mid-tone should not be similar in overall size. A previous post about a painting called "Sea Oats" shows one example of revision that included adding some very light clouds and brightening light areas on a dune as well as deepening just a few very dark highlights.

     Another painting that required some added variety was "Hanna Park Heron" (sorry the colors here are not as intense as in the actual painting) , shown here beside the original reference photo (more about this painting was posted earlier also). Notice how the reference photo's background vegetation naturally repeats types of plants (shapes), colors, and sizes--not ideal for artistic composition. Then, notice the additions of the two light grey dead trees to change that sameness and to provide strong verticals across from the large palm trunk. You will be able to spot other changes from the reference photo and to consider my possible reasons for them.


Question of the day: Are you mostly a hands-on learner, or do you (like me) rely on well-illustrated books to learn and grow?

Saturday, January 19, 2013

Intracoastal Waterway Views Near Jacksonville, Florida

     Among our lovely wetlands and waterways here in Coastal North Florida, the Intracoastal Waterway provides a variety of views both for the boater and from the land. During an unusual warm spell last week, my friend Dee and I had a pleasant lunch to celebrate her birthday, sitting on the deck of the Ponte Vedra Beach Barbara Jean's Restaurant, situated on this waterway.


     Dee had suggested that we lunch there some nice day to enjoy the views from this waterside restaurant. A true friend, she keeps my landscape painting in mind wherever she goes and has guided me to discoveries and scenes I might not have found otherwise. 

     These photos show the bank across from us (you are looking west at the mainland from the long, narrow off-shore island on which the Jacksonville area Atlantic Ocean beaches lie). The vegetation is so thick here that it is difficult to pick out an ideal painting composition from what naturally presents itself, but every element is good background for inclusion in possible paintings. The bare cypress in the vertical photo (say hello to the osprey perched at the top) could anchor an excellent painting and provide a strong vertical and a perfect contrast to a green expanse. 

     As we ate and chatted, the tide began to run out (headed north--to our right from here) and revealed a growing beach-like area on the opposite bank that also added variety to our view. And various dead trees, stumps, and angling tree trunks serve as sculptural elements that could enrich a painting composition.


     I am grateful to Dee for showing me this area, which is markedly different from some nearby stretches of the intracoastal waterway bordered by flat, wide salt marshes (like the views in the old movie "Prince of Tides"). In other areas, thicker wooded areas include stately, centuries-old live oak trees dripping with Spanish Moss. And of course, the stretch of the intracoastal that runs straight through the heart of the city of Jacksonville, following the St. Johns River, provides boaters a completely different kind of view of tall buildings, our symphony hall and live theatre venue, along with riverside restaurants, shops, and entertainment sites.

     Just as I did the last time Dee took me on a find-some-paintings tour of some of her favorite spots, I'll let you know when any of these elements--or perhaps, a full scene--appear in a painting. 


Question of the day: Aren't observant friends, appreciative of the natural world around us, a treasure to cherish?

Friday, October 26, 2012

Newest Painting Is Complete--"River View at Kingsley Plantation"

     I felt a little rushed to complete this 18" x 24" acrylic on gallery-wrapped canvas in time to deliver it to Paddiwhack Gallery for a special exhibit. However, I am quite pleased with the result. "River View at Kingsley Plantation" utilized my cabbage palm painting photos and study, mentioned in the most recent previous post. It may not seem like a big deal to everyone, but creating the palm trunks and especially the palm canopy (and even the part of a canopy visible on the far right) required special study and careful work.

     Then, the first try after my studies produced a very nice canopy on the furthest palm away from the viewer (which appears in the middle of the three seen), but I painted much of it out and started again. That canopy had been very high on the canvas and was not seen in full (in other words, the viewer of the painting saw maybe the lower two-thirds of it at most). On e-critique advice from Linda Blondheim and on further reflection myself, I concluded that for good composition and better balance, that entire palm canopy needed to be lower so that it would be seen in full. Other changes from the main reference photo (seen below)--made to enhance the composition--included painting in a more interesting sky, adding a kite, which is one of Florida's gorgeous soaring shore birds, and simplifying the tall grasses.  My literal rendition of the bulkhead along the river at the Kingsley Plantation National Parks historic site bothered Linda. She would have preferred a softer, more organic, curving line, perhaps of the mud flats that line the river bank at low tide. I did consider her suggestion to replace the bulkhead, knowing that it would certainly work well. However, in the end, I stayed with the straight  bulkhead as it is, partly because viewers who have visited Kingsley Plantation have seen it there and partly because something about the sharper angles appealed to me as a change from some of the softer composition edges I have used in other pieces. 


     You can see other changes from the actual scene that I made in the painting. But, you can also see that this particular photo already represented a composition that appealed to me without major rearrangement. Compared to the times that I have used a reference photo that had appealing elements but was not composed well and required major revision in painting, beginning with a solid photo composition is much simpler and more satisfying.

Question of the day: Do you personally prefer fairly realistic--or even near photo-realistic paintings--or some other type such as impressionistic or abstract?

Saturday, August 4, 2012

A Second New Salt Marsh Painting--"Castaway Island Cedars"

     "Castaway Island Cedars" is the second of two paintings begun at a painting workshop with painter/teacher Roger Bansemer. I described the painting process for "Castaway Island Palms" a few posts ago when it was finished. Both are 9" x 12" acrylic works on gallery-wrapped canvas using reference photos and notes from my outing to Castaway Island Preserve on the intracoastal waterway here in Jacksonville, Florida. Each scene shows characteristic North Florida native trees and other vegetation growing in or near salt marsh areas, scenes like those that greeted the first Europeans to step on the shore of what is now Florida.


     With apologies for the slightly washed out look of the palms photo, here is the other painting. As always, you can click on the images to enlarge the view.


     I used the same limited palette for these two scenes so that they could hang harmoniously as companion pieces, but made certain each could also work alone. This palette includes: cerulean blue, ultramarine blue, Payne's grey, cadmium yellow light, Indian yellow, cadmium red light, white, and buff, with some burnt umber in a few of the mixes. As described in the "Castaway Island Palms" post, this is my first experience using Indian yellow, a warm, slightly orangey hue. It's very nice. I rubbed each canvas with an uneven burnt sienna mid-tone before painting, which provides a warm undertone unifying the entire work as well as a base from which it was easy to judge the tones (relative darks and lights) of the rest of the painting. Beginning with what I planned as the darkest darks, then moving to lights and mid-range tones, I laid in the rough shapes of the composition, then gradually worked in greater detail. "Castaway Island Cedars" came together more quickly (or in my case, less slowly :>) than the palms piece.


     For each of these paintings, I had excellent reference photos, including those that showed more detail of the red cedar branches and needle clusters, or other crucial detail areas. Several times in the workshop, Roger Bansemer stressed the importance of starting with well-composed reference photos with adequate tonal variation. Sounds obvious, maybe, but I have begun with so-so photos more than once in the past and then struggled to compensate for a poor composition or monotonal appearance. There is a point beyond which I am not good at "making it up"--especially in trying to add something to the given scene that is not actually there. Some aspects of a scene are fairly simple to adjust. Given the lush, varied vegetation here in coastal North Florida, I inevitably need to leave things out to make a pleasing composition, which is simpler than adding elements. The horizon (which is often near the horizontal center of photos) can be moved easily to avoid cutting the composition in half (much less pleasing to the eye than placing it a third of the way from the top or bottom--or at another less symmetrical level). Beyond that, the fact that these works both came from good, solid reference photos helped me complete them with less stress and difficulty than sometimes.
Question of the day: In visual art (including photography), how often do you think about or notice the placement of various features of the overall composition? Do you know why you are particularly drawn to certain compositions?  

Sunday, May 20, 2012

A Rewarding Painting Workshop Taught by Roger Bansemer


This past weekend, I attended a two-day landscape painting workshop in historic St. Augustine, Florida, taught by the noted painter, Roger Bansemer. The paintings in this post are by Roger, one done as a demonstration each of the two days. (By the way, I am trying to set up this post on the new blogger format and having trouble setting up the post the way I want to. I'm not sure how it will turn out--sorry if it's a little strange.) 


Bansemer's instructional painting television program has recently begun showing on our public tv station, and I took a look at his website after viewing an episode. Lo and behold, he offered a painting workshop over Mother's Day weekend only about a 45 minute drive from our home. I liked his painting style and his easy-going, yet very informative, manner on the television program, so enrolled in the workshop, hoping he would be a compatible teacher for me.


The workshop exceeded my expectations. As regular readers know, I tend to paint slowly and cautiously and to get overly fussy with detail in a detrimental way. Roger Bansemer was the perfect teacher to push me to a bolder, more "painterly" approach and to quash the fussiness right from the start.


Each workshop morning began with a lovely breakfast buffet, provided by the staff and volunteers of the St. Augustine Art Association, where the workshop met. Then Roger began the demonstration painting of the day, based on a photograph. He used acrylic paints, as I do, but welcomed students who were working in oils as well. His instruction covered all aspects of landscape painting, beginning with choosing a scene, then establishing the overall composition, balancing values (lights, darks, and in-between values), using a limited palette of colors, and other basics. As he spoke, he illustrated the method in his demonstration painting and kindly tolerated and answered our wide-ranging questions. 


My photos show each of his two demo paintings in an early stage and then at the end of the day after he had gone beyond the initial demo stage, using his lunch period and other free moments during the day to flesh out the piece. To begin, he rubbed a burnt sienna tone into the board as a mid-tone base. Then, he established the major dark areas, some of the lightest lights, and continued to fill in, working all around the piece in a balanced way. Clicking on any photo will enable you to see it enlarged.


After showing us the basics and answering questions, he turned us loose to work on our own chosen paintings and circulated from one student to the next, guiding each person's work. The workshop was very helpful to me, providing new skills, inspiration, and tips focused on my individual needs as an artist.
Question of the day: Isn't learning and stretching ourselves one of the most enlivening activities we can pursue?

Saturday, February 4, 2012

Techniques for Painting Shadows in Landscapes

Today, let's consider shadows in landscape paintings once more, this time considering a few "how-to" techniques. (Scroll down a bit for earlier posts on this topic.) Of course, since painting is very individual and variable, I realize that my techniques and methods are only one way to approach this important element in a scene. I would love to hear from other artists who approach shadow painting differently--as well as from readers who might "see" them differently. I think shadows are fascinating to consider.
"Wooded Path" is adapted from some photos I took on the extensive grounds of the Kingsley Plantation, which I have written about in several earlier posts. This historic site is nestled in an immense preserve area just north of Jacksonville, Florida. The Timucuan preserve includes salt marshes, wooded areas, and Florida prairie, as well as other land and water habitats. The 16" x 20" acrylic painting on gallery-wrap canvas shows a bend in a path as it leads deeper into the woods. Unfortunately, I was not able to get a good, true photo of this piece (don't know why that happens sometimes). The photo of the final version, seen below an earlier view and a detail of the foreground, looks misty in the mid-ground, whereas the actual painting is clear. The work-in-progress took a better photo--hope you can see some value in the improvements in the final version in spite of the poor photo.
At first, the path was too uniformly dark and mid-dark in tone, so in the work-in-progress photo above, you see that I have lightened whole areas, especially just before the bend. Then I added some shadow areas gradually, being careful not to overdo either the amount of shadow area on the path or the darkness of the tones.
Linda Blondheim, in one of her excellent workshops, helped me see that the foreground shadow of the tree trunk was too dark as it moved away from the tree. Real life shadows tend to be darkest at their "source" (right next to the object casting the shadow) and then partially fade along the length of the shadow. Actually, I knew that, but had not been successful in my attempts to vary the shadow. It never looked right. Linda advised that I pull in other path tones and colors from the sides of the shadow edge as it moved away from the tree. To my eye, that worked like a charm, much better than my earlier tries at just gradually lightening the color I used for the shadow as it extended out.
One other change, made before Linda's workshop, was to revise the curve of the path in the foreground. Although not related to shadows, I thought you might like to see that revision, too. In the earlier version, it seemed like the perspective was off, like the path sort of spilled into the viewer's lap. The detail photo shows my sketched lines for revision, which led to an improvement in the composition, I think .
Question of the day: Do you look at shadows differently after hearing about the challenges involved in painting them?

Sunday, January 8, 2012

The Importance of Shadows in Landscapes

Recently, I have been reflecting on how important shadows have been in some of my landscapes and seascapes. Although a few scenes, either for reasons of the weather or for the perspective involved have few or no obvious shadows, most landscape painting and photography relies on shadows for drama, contrast, indication of light source, and pattern.
This will be the first of several posts about shadows, and I invite artists and non-artist viewers of nature to contemplate the subject with me. Today, the photos show a painting that originated from my interest in shadow patterns one afternoon, as well as one reference photo from the actual location. The rest of the scene evolved gradually, but the foreground shadows were both the starting point and my primary interest in the project. This is an 18" x 24" acrylic painting on gallery wrapped canvas adapted from a location on a private school campus in Jacksonville, Florida.
In early work, I sketched, then rough-painted indications of some of the darker value areas, as shown in a post about a year ago about the painting process. As the painting progressed, I wanted to create liveliness and interest in the shadowed grass, so tried to vary both the patterns and the colors in the shadows. One of the tricks my essentially mathematical mind played on me involved the patterns. Knowing that a nice balance of variety and related rhythms is most attractive to viewers, I painted in much of the grass and shadow area very quickly, trying not to think overmuch about what I painted where. Oddly, what I produced was a very regular, boring, repetitive pattern. Whoops--good thing that acrylics dry quickly and can be painted over relatively easily. In addition to the shadow patterns and variations in lighter and darker regions, notice the variety of colors--not corresponding to nature, really, but added for vividness and glow. This painting has a fairly strong palette to begin with, including the intense (and sometimes difficult to use) phthalo blue and a strong purple. All the darker tones in my palette appear in the shadows--purples, blues, greens, browns, and greys.
I am thrilled to say that our local son and daughter-in-law particularly liked this piece and accepted it as a second anniversary gift recently. Since it is among my personal favorites as well, it will be wonderful to be able to see it often.
Question of the day: Do shadows fascinate anyone else out there? There is so much one could say, both about actual visible shadows and about shadow as metaphor in life.

Friday, May 6, 2011

Details of New Painting and More About the Painting Process

The Lyons Club Park Boardwalk painting got off to a decent start in terms of composition, but some other aspects of the process were unsatisfactory at first and required revision. For those of you interested in the painting process, that is the topic today. The photos are close-up detail shots of the new painting I showed you last time as well as a photo of the entire piece.
As I mentioned last post, I shifted the viewpoint a bit from the reference photo, but you could see that I retained the basic elements of the scene without radical change. I raised the horizon line, which often seems to land in the horizontal center of my photos, because a painting should (almost) never be cut in half by a major element or line. I made small, grey-tone sketches of several possible compositions to consider and gridded over them horizontally and vertically into thirds (resulting in nine smaller rectangles). I try to place my focal point near the intersection of two of these lines, which is pleasing to the eye (these are sometimes called "sweet spots"). In this piece, I regard the center of interest as the area in the upper left third where a single tree stands and the boardwalk comes to a point and makes a sharp turn to follow the river bank. That is such a compelling angle that the viewer's eye is inevitably led there. But I include a path over to the right and then visual paths up, down, and around so that the viewer's eye will naturally move through the entire composition and find other areas of visual interest as well.
I thought I had chosen a perfect palette for this painting, but needed to change it along the way. I use a limited palette for each work, meaning a selection of certain tube colors which will blend well to create the entire range of color variations for the scene. Even though the viewer may not notice the use of a limited palette, the result is more pleasing and harmonious than using many randomly chosen colors would be. The palette I choose varies with the subject, weather, and season. This painting has no tube green at all; greens are blended from blues and yellows, and modified with red, purple and grey. After one change, the final palette consisted of cerulean blue, cobalt blue, paynes grey, dioxizine purple, cadmium yellow light, yellow ochre, cadmium red light, buff, and white. Although the photo is almost entirely in greens and blues, I wanted a livelier scene and added shades of purple in the water. Then, I used burnt sienna (a favorite color) to add a range of tones in the marsh grasses. This was a mistake, in my opinion. The burnt sienna did not blend well with the blues and purples I had used, so I put it back in the drawer and experimented with other shades for the grass. Some of our North Florida marsh areas include a sort of brownish burgundy grass that seemed likely to fit in, so I worked that into various spots in the grass along with some buff and greenish blends. This particular burgundy is a blend of cad red light, paynes grey, and a little purple (used with care--the purple is strong).
This painting came together a bit more quickly than sometimes (I am a sloooow painter). If you have any other questions about the painting process, please feel free to ask either in a comment or to email me (see profile for address). I enjoy sharing "shop talk" with interested readers.
Question of the day: What aspects of the painting process (if any) are of interest to you?