 Bansemer's instructional painting television program has recently begun showing on our public tv station, and I took a look at his website after viewing an episode. Lo and behold, he offered a painting workshop over Mother's Day weekend only about a 45 minute drive from our home. I liked his painting style and his easy-going, yet very informative, manner on the television program, so enrolled in the workshop, hoping he would be a compatible teacher for me.
 Each workshop morning began with a lovely breakfast buffet, provided by the staff and volunteers of the St. Augustine Art Association, where the workshop met. Then Roger began the demonstration painting of the day, based on a photograph. He used acrylic paints, as I do, but welcomed students who were working in oils as well. His instruction covered all aspects of landscape painting, beginning with choosing a scene, then establishing the overall composition, balancing values (lights, darks, and in-between values), using a limited palette of colors, and other basics. As he spoke, he illustrated the method in his demonstration painting and kindly tolerated and answered our wide-ranging questions.
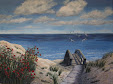
  My photos show each of his two demo paintings in an early stage and then at the end of the day after he had gone beyond the initial demo stage, using his lunch period and other free moments during the day to flesh out the piece. To begin, he rubbed a burnt sienna tone into the board as a mid-tone base. Then, he established the major dark areas, some of the lightest lights, and continued to fill in, working all around the piece in a balanced way. Clicking on any photo will enable you to see it enlarged.
After showing us the basics and answering questions, he turned us loose to work on our own chosen paintings and circulated from one student to the next, guiding each person's work. The workshop was very helpful to me, providing new skills, inspiration, and tips focused on my individual needs as an artist.




 Posts
Posts

